Up Next

Pre-season Formula 1 testing is the time of year when flow-vis paint comes into its own.
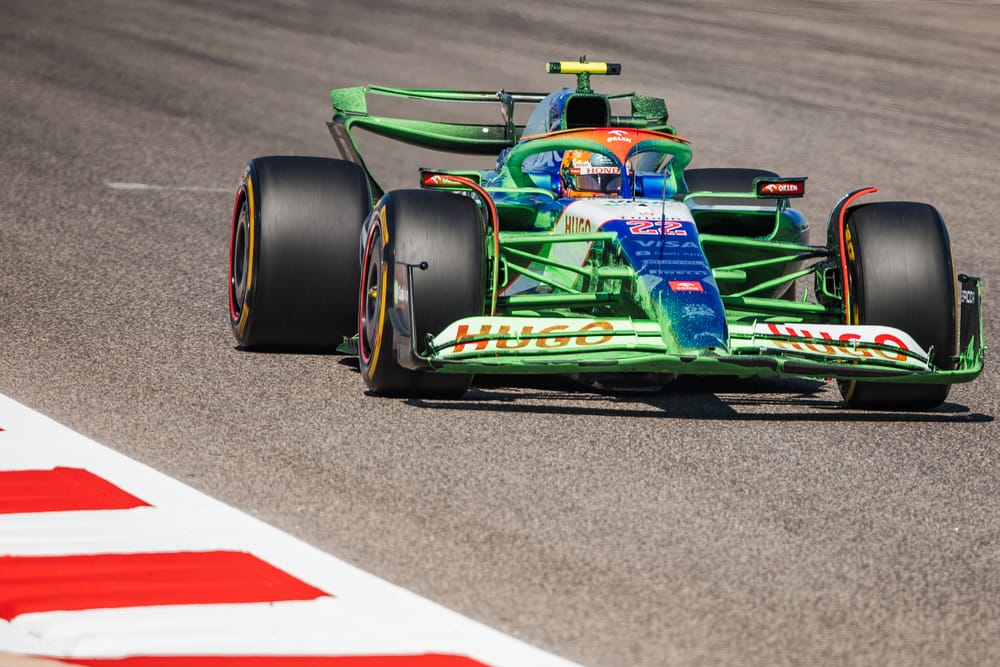
As usual, teams start out running lots of aero rakes to try to understand the airflow structure away from the car surface, then cover their cars in flow-vis to see what it looks like on the body surface.
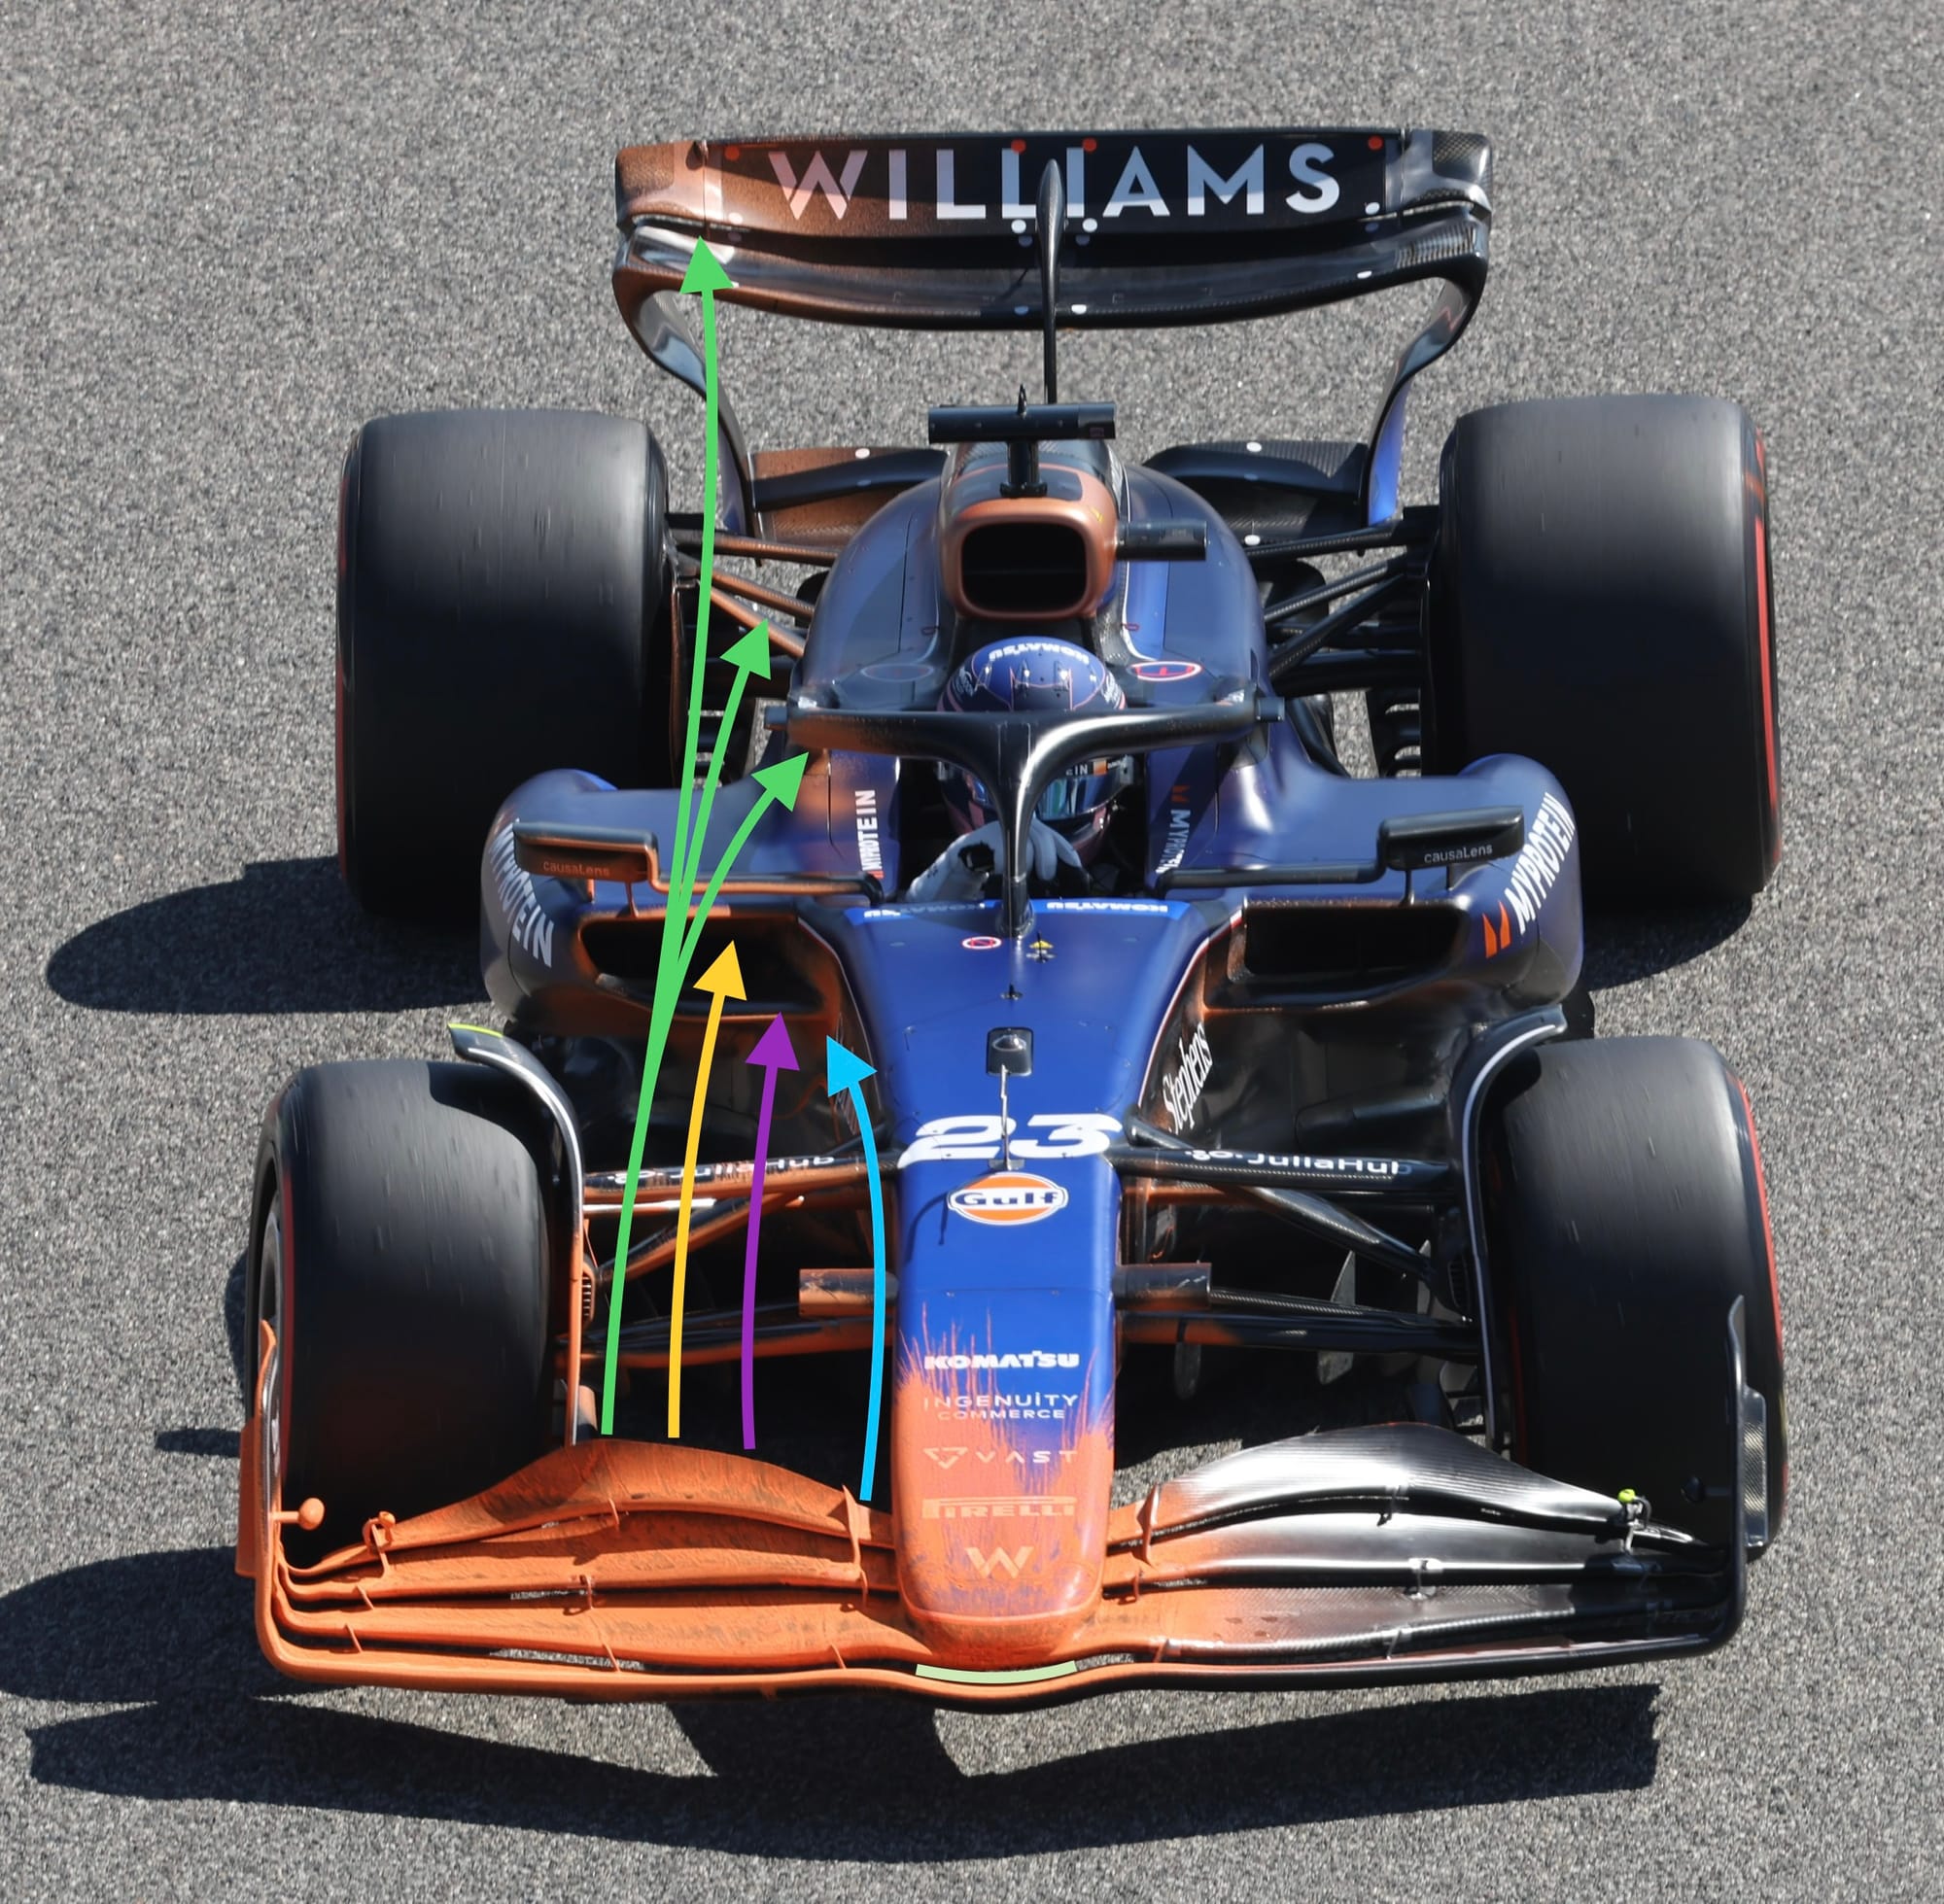
Williams went to extremes on the first morning of 2024 running by using what looked like a month’s worth in one go. It seemed just to tip a bucket of flow-vis over one side of the front wing - which was useful for us as it turned the FW46 into a guide to how teams use this tool.

The aim of what Williams did was to see how well the front wing underside airflow is attached. But I would say that there is a bit too much on there to actually read much from it. If the flow-vis is too thick, you lose some of the fidelity and detail.
The goal would be to check where the front wing wake is ending up in terms of how it is presented to the sidepods.
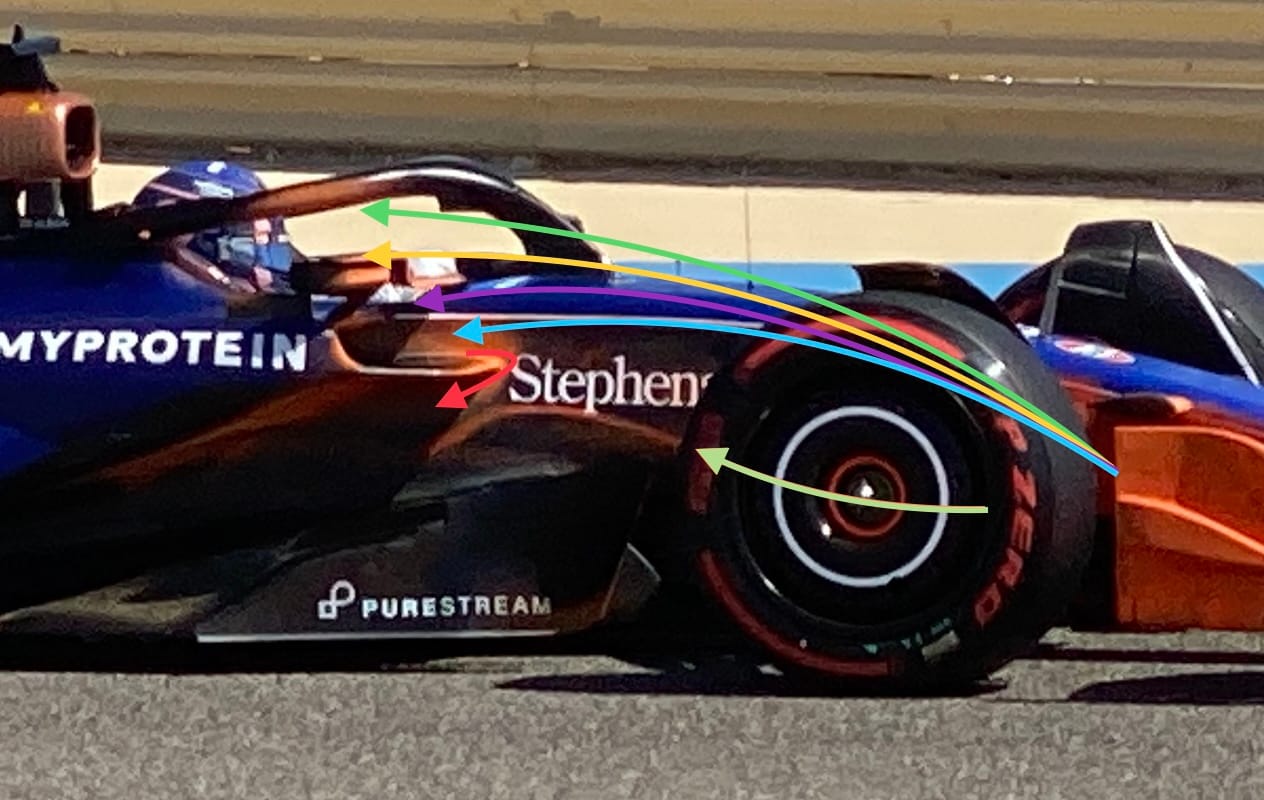
To understand that, I have extended the flow-vis lines from where I think they are coming from – so basically ignored the front tyre and wheel.

Starting at the top, the green, yellow, magenta and light blue airflows all come off the front wing flap trailing edge somewhere across its span.
They vary in height due to how hard the wing is affecting that flow. The span location that I believe it is coming from is again in the same colours.
My pet hate is shown by the red arrow just at the inlet. It highlights the flow that has spilled out of the radiator duct and been pulled down into the airflow that is travelling through the sidepod undercut.
I’m not a fan of this spillage as it changes the airflow structure from low speed when the radiator can cope with as much air as is being presented to it to high speed when it can’t cope with that amount of flow. Basically it has to go somewhere and that somewhere needs to do as little harm as possible.

The light green arrow on the outside of the wheel and the highlight in the slot gap below the nose is to show where that flow is coming from underneath the chassis.
The flow that has gone through the front wing forward element slot gap has travelled up the underside of the nose and will then be displaced by the keel section of the chassis, which is under the driver’s knees.
The teams will do much the same as I have done when it comes to looking at the flow-vis. They will study the close-up photographs taken of the car on track and when it returns to the garage.
It just gives that extra little bit of information and understanding to the teams to put together with all of the other data.


