Gary Anderson’s guide to flow-vis in F1 testing

Flow-visualisation paint, better known as flow-vis, is a regular sight during pre-season testing as Formula 1 teams attempt to understand the airflow passing over their cars.
It’s very effective for understanding the surface flow of your car and where the airflow coming off a certain component ends up travelling to.
For example, if you put it on the front wing you can see how the trailing edge flow passes across or around the front suspension components and how it affects the radiator entry duct.
This is why you often see cars covered in fluorescent yellow paint, seemingly thrown onto them in a very haphazard fashion – although teams have also been known to use a version that’s invisible to the outside world and only shows up under ultraviolet light.
Teams like to keep this information from rivals, but as we know eagle-eyed photographers are always there with their cameras to get a quick snap.
Basically, flow-vis is like paraffin with a fluorescent dust mixed into it. It can really be any colour and doesn’t have to be fluorescent yellow.

The airflow will move the flow-vis over the car’s body surface. When the car comes back into the pits someone from the aerodynamic department will take a few quick snaps of interesting areas and flow lines before the mechanics will set about cleaning it off.
During the run, the paraffin will partially dry and the lines that are left are like dirty streaks that you get on your road car on a mucky day.
If you put too much flow-vis on, it will puddle in some areas and just make a mess. But too little and the lines will stop before they get to where they might just offer some further information.
Flow-vis is a bit of a tradition. It does give you a clue about what the surface airflow is like and it can highlight where you might be suffering from boundary layer problems where the airflow is slowing down dramatically. The boundary layer is the thin strip of airflow that is in contact with a surface, effectively increasing the drag.
But you still need to use the monster aero rakes that you see teams running to get the off-surface flow. This airflow will affect the on-surface flow, but not the other way around.
We used flow-vis during my days as a technical director, especially if you introduced something new. Sometimes, instead of spraying it over the car surface in the garage we would put it in a small container and use a windscreen washer pump, piping and jets and pump it out onto a surface when the car was up to speed. That stopped it getting displaced at too early a speed or at the wrong ride height and not showing the areas of airflow separation that we were interested in.
If you were suffering from airflow separation problems in the diffuser or underfloor it was useful doing it this way to identify where the problem originated and what was causing it with the car at the ride heights where the problems we most critical.
If you painted it on in the garage the flow-vis would be washed over he surface while the ride height was higher than when the problem was instigated.
Also, on the underside of wings it is useful to understand the flow patterns and any transverse flow generated by the mounting system or by slot-gap separators, but when the front wings were closer to the ground it was important to add the flow-vis when the wing was near the ground and not just in the garage.
However, in this day and age, CFD has increasingly become the norm for optimising these areas of concern and flow-vis will be used more to correlate your CFD findings.
You could say that flow-vis is just another tool in your tool box of understanding. It’s simple and cheap and there is not much in F1 that you can say that about, so why not use it?
Normally, problems only crop up when you least expect them or when something isn’t working as planned. It doesn’t hurt the car or its performance so you can use it at any time during the sessions to gather some extra information.
These are the basic principles for the use of flow-vis, but we can look at some photos of cars running with it from the Barcelona test to understand a little more about what teams are looking at in specific regions and what using it reveals.
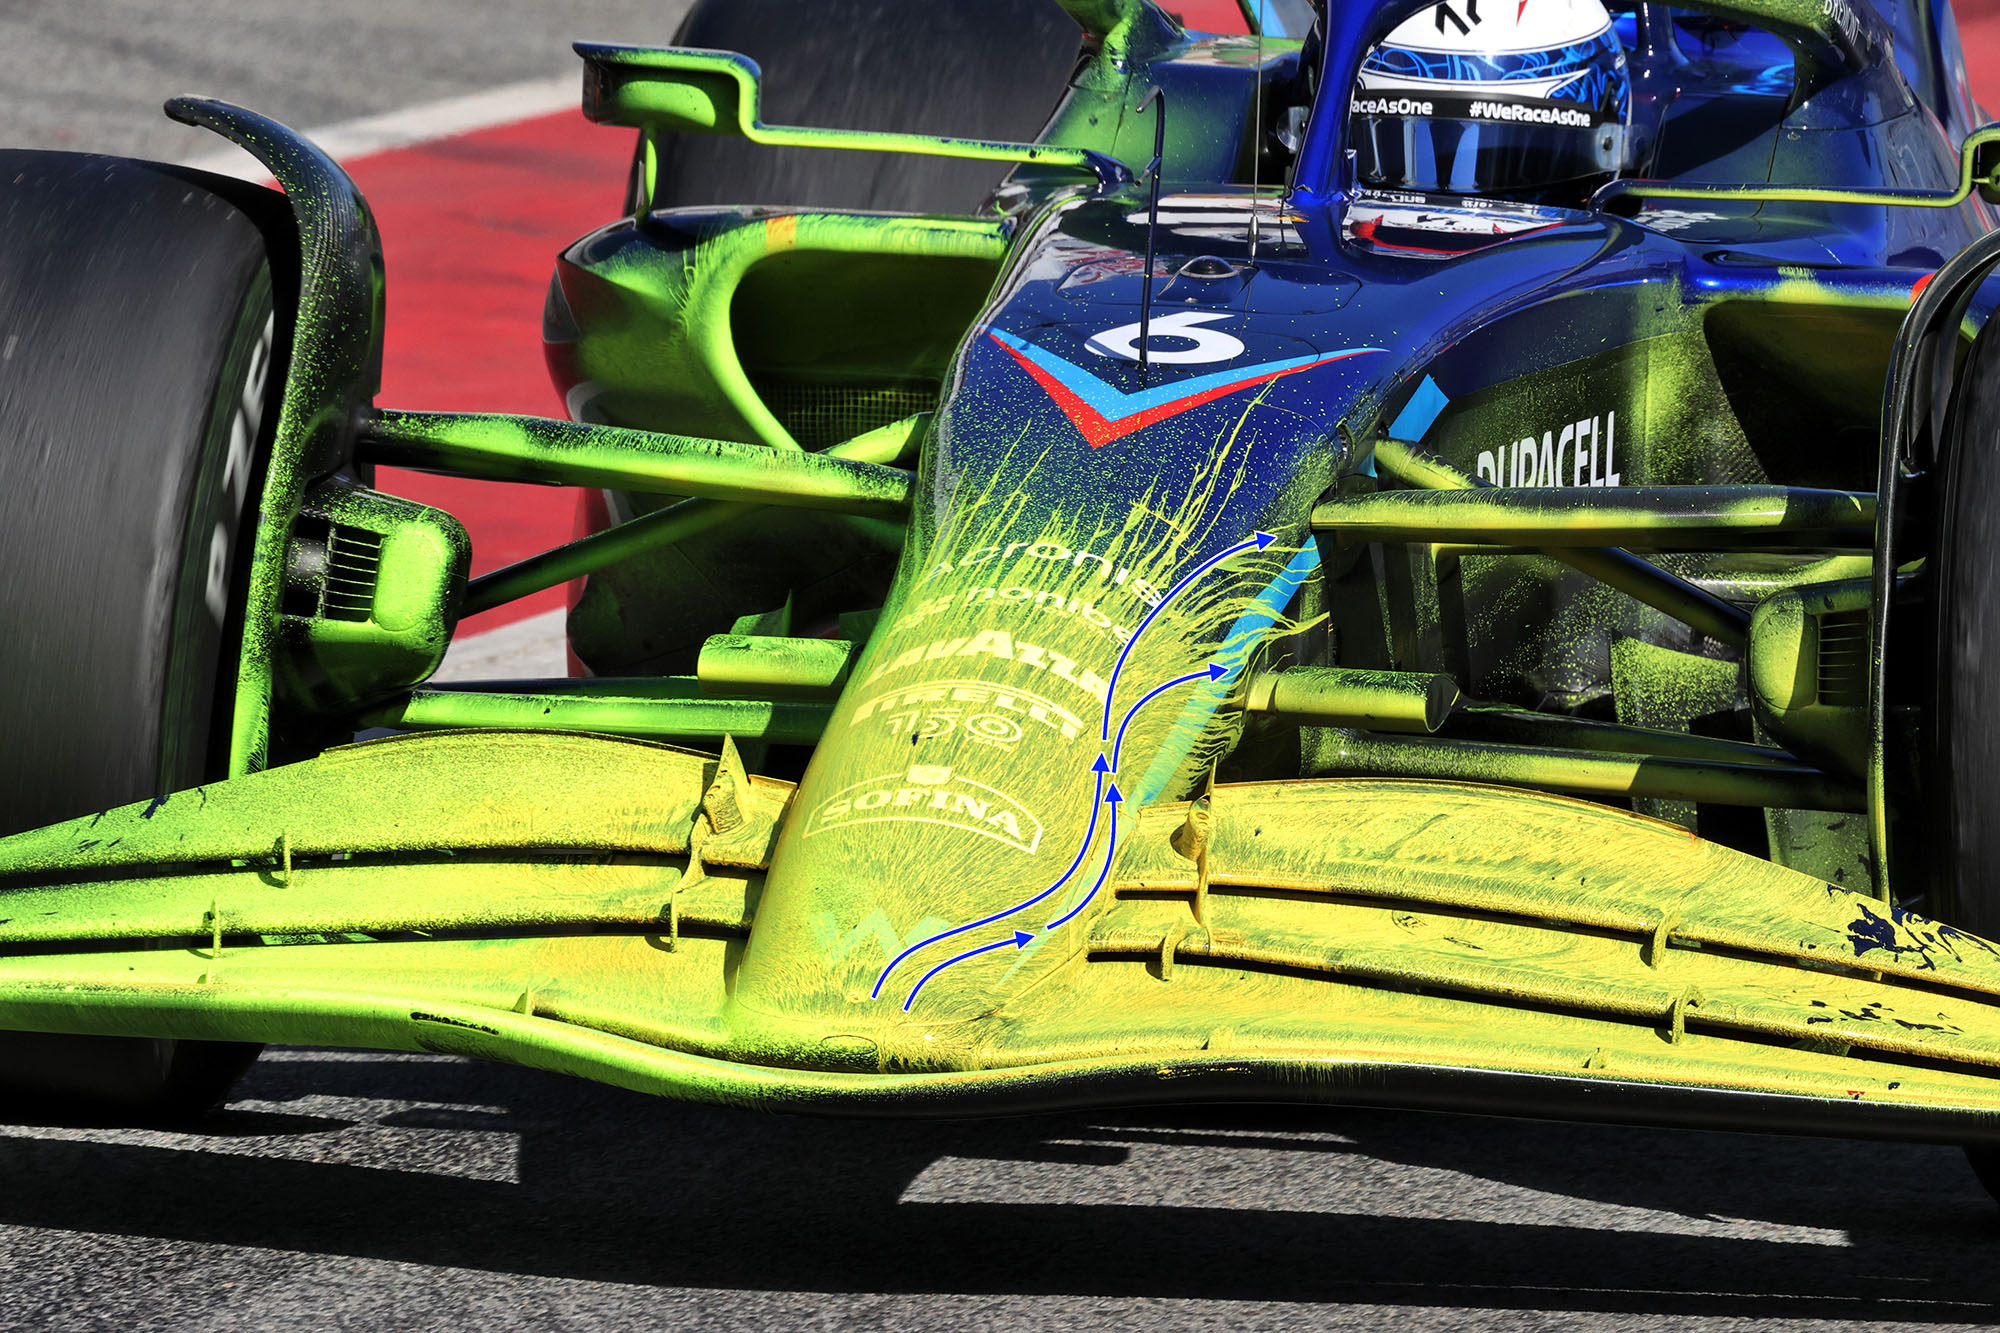
Williams must have had some extra flow-vis available and certainly didn’t spare it judging by the amount covering the car.
Its nose concept has a more rounded top surface than most of the others. This flow-vis test was looking to see if the flow over the top surface was travelling over that soft outer corner and staying attached as it went under or around the suspension arms.
You can also see what I mentioned about the flow coming off the front wing and how it travels across the front suspension arms and onto the radiator inlet openings, and even the rear view mirror mounts.
I have added a couple of blue lines to show what they will be looking at where the wing flap inner ends join the nose and how with the high-pressure on top of the flap it moves that flow slightly upwards.
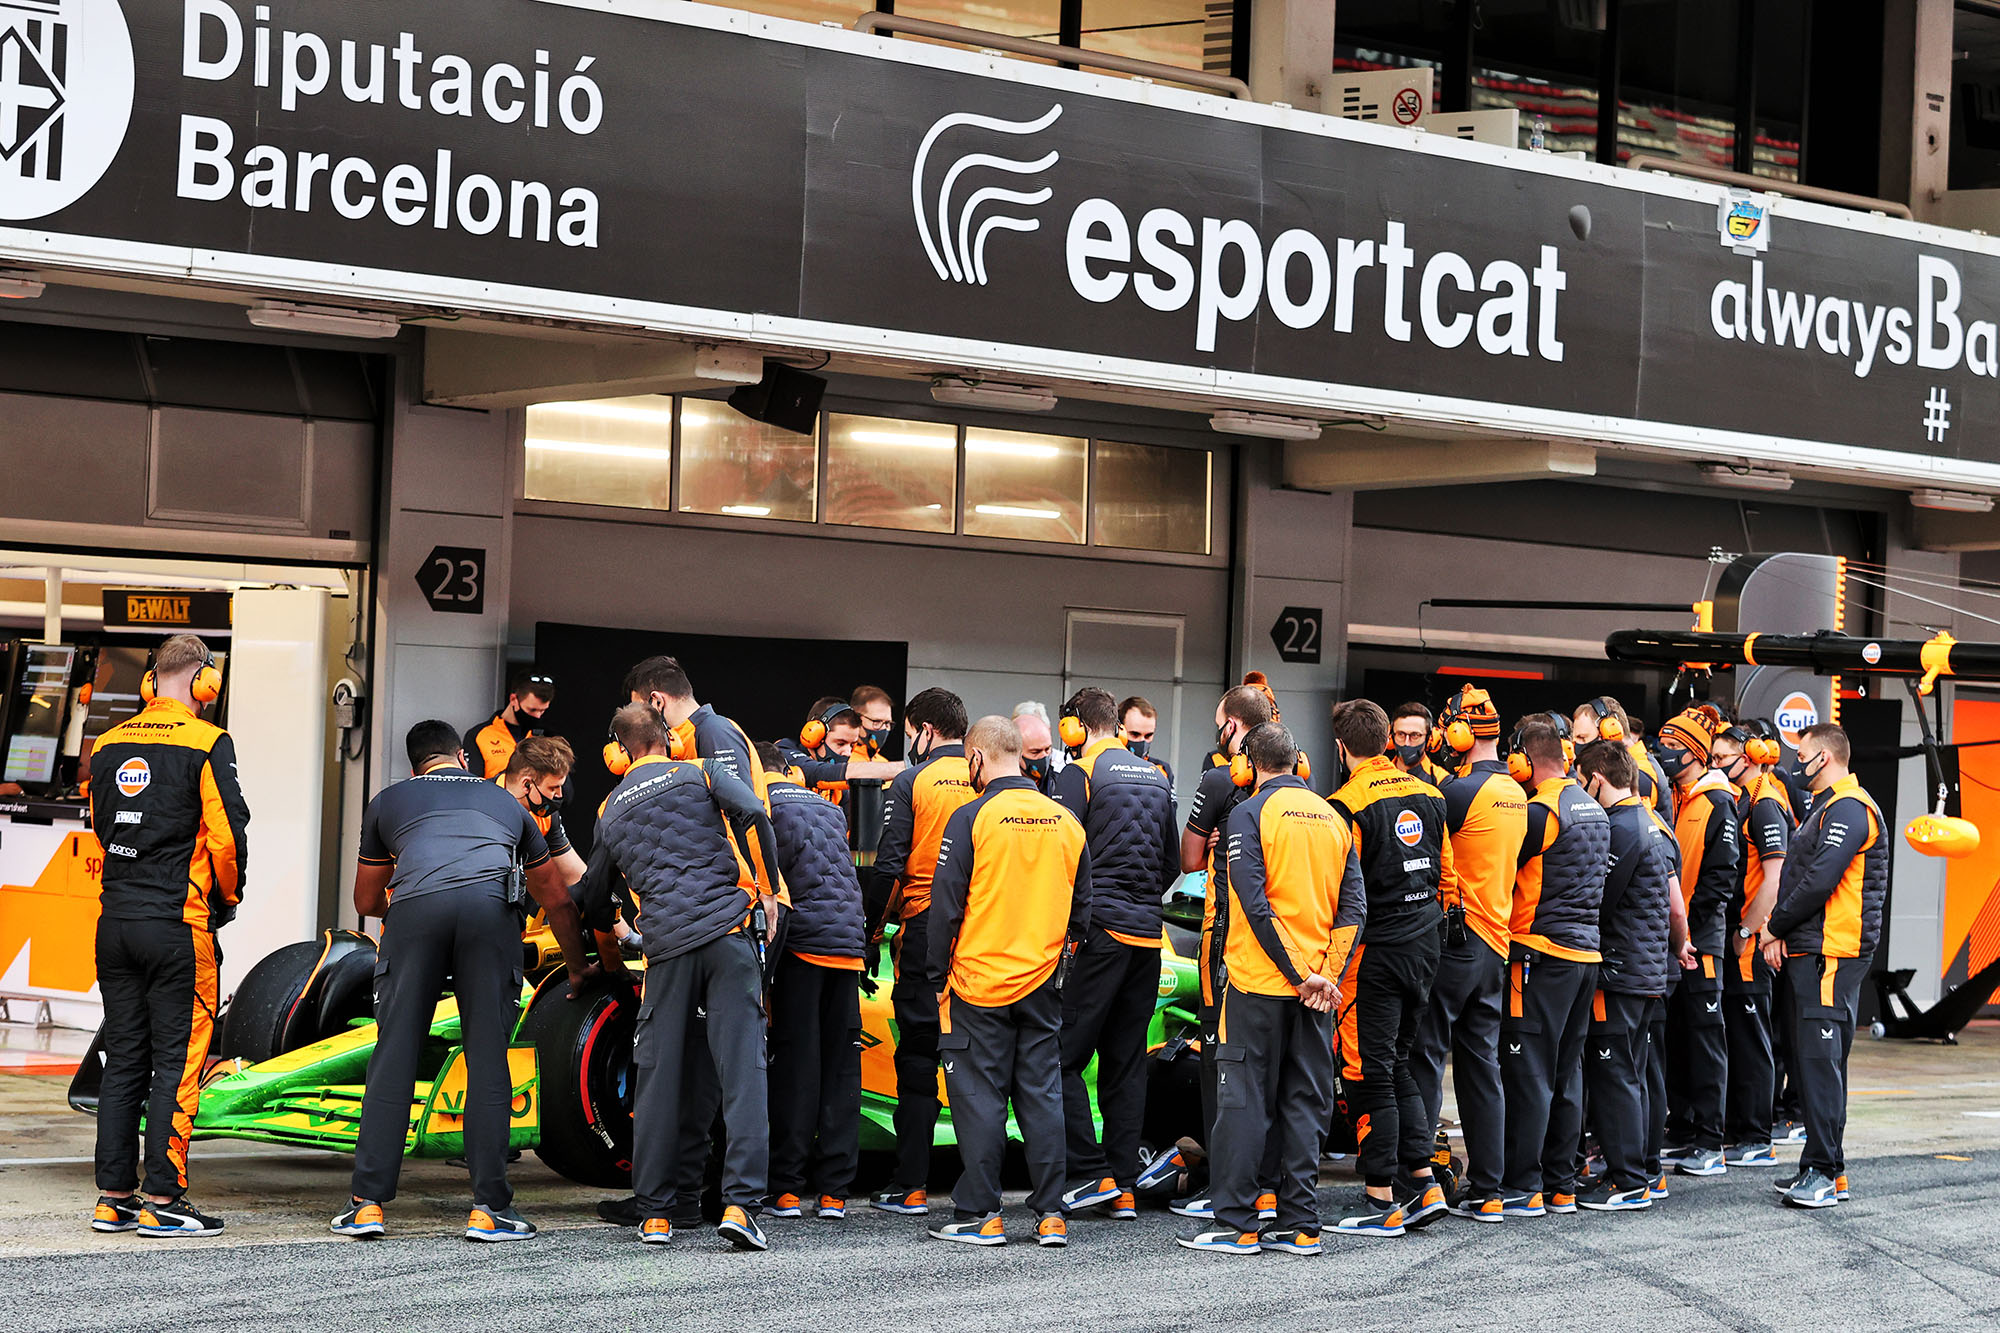
McLaren basically covered its complete car in flow-vis. We often say that it’s the complete airflow structure that’s important and McLaren clearly wanted to understand as much of that as possible.
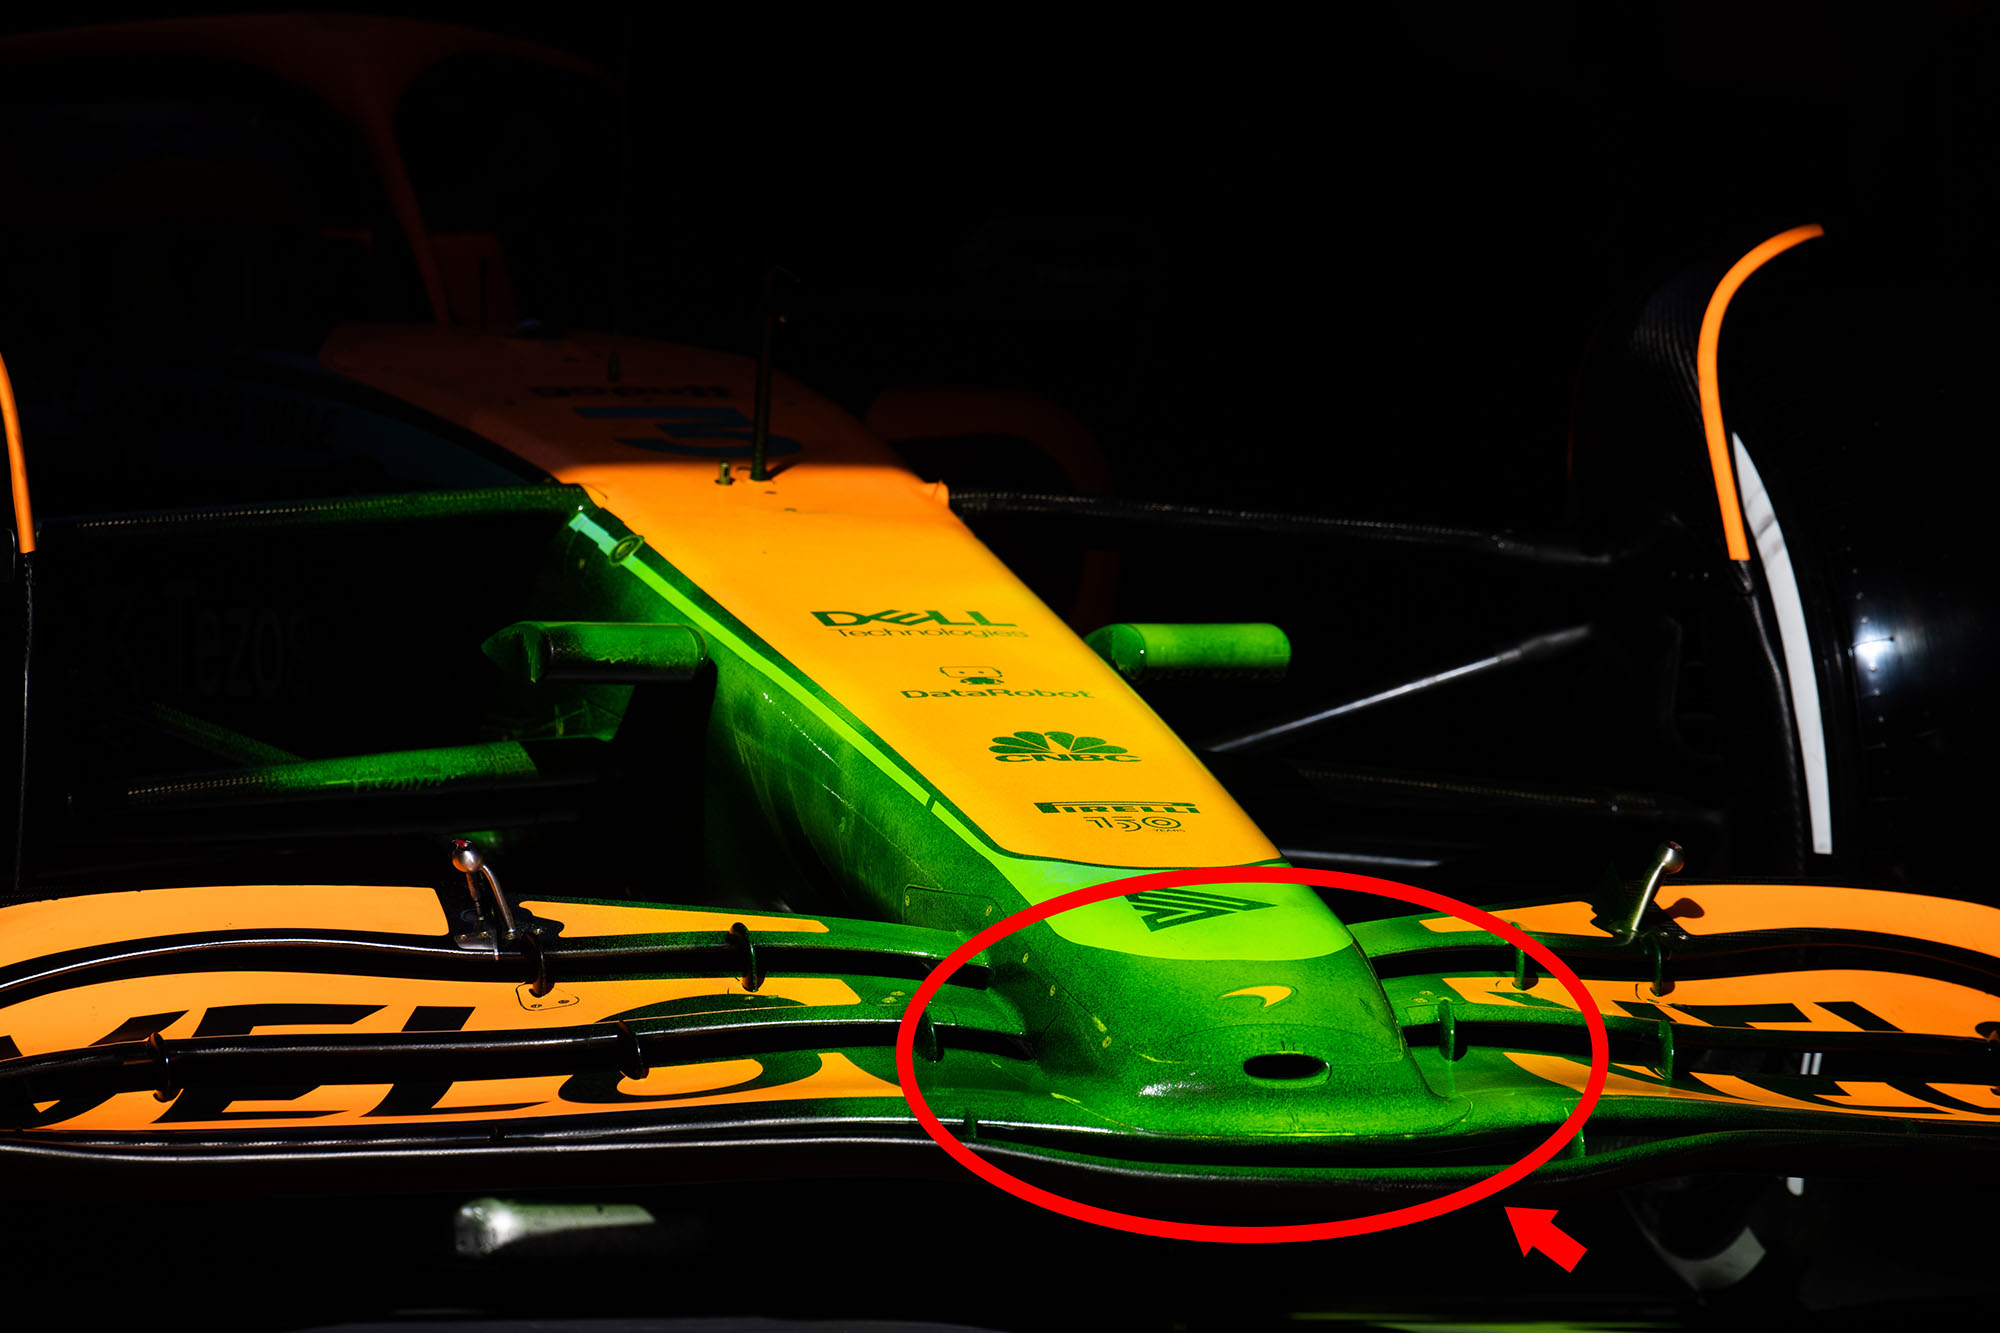
The area on the front of the nose circled in red is where you get a stagnation point. Because of all the different pressures in that area, the airflow just doesn’t know which way it should travel. If this is left unaddressed, it can cause problems further downstream.
This looks good on the McLaren and the small ‘driver cooling duct’ is positioned just in the correct place.
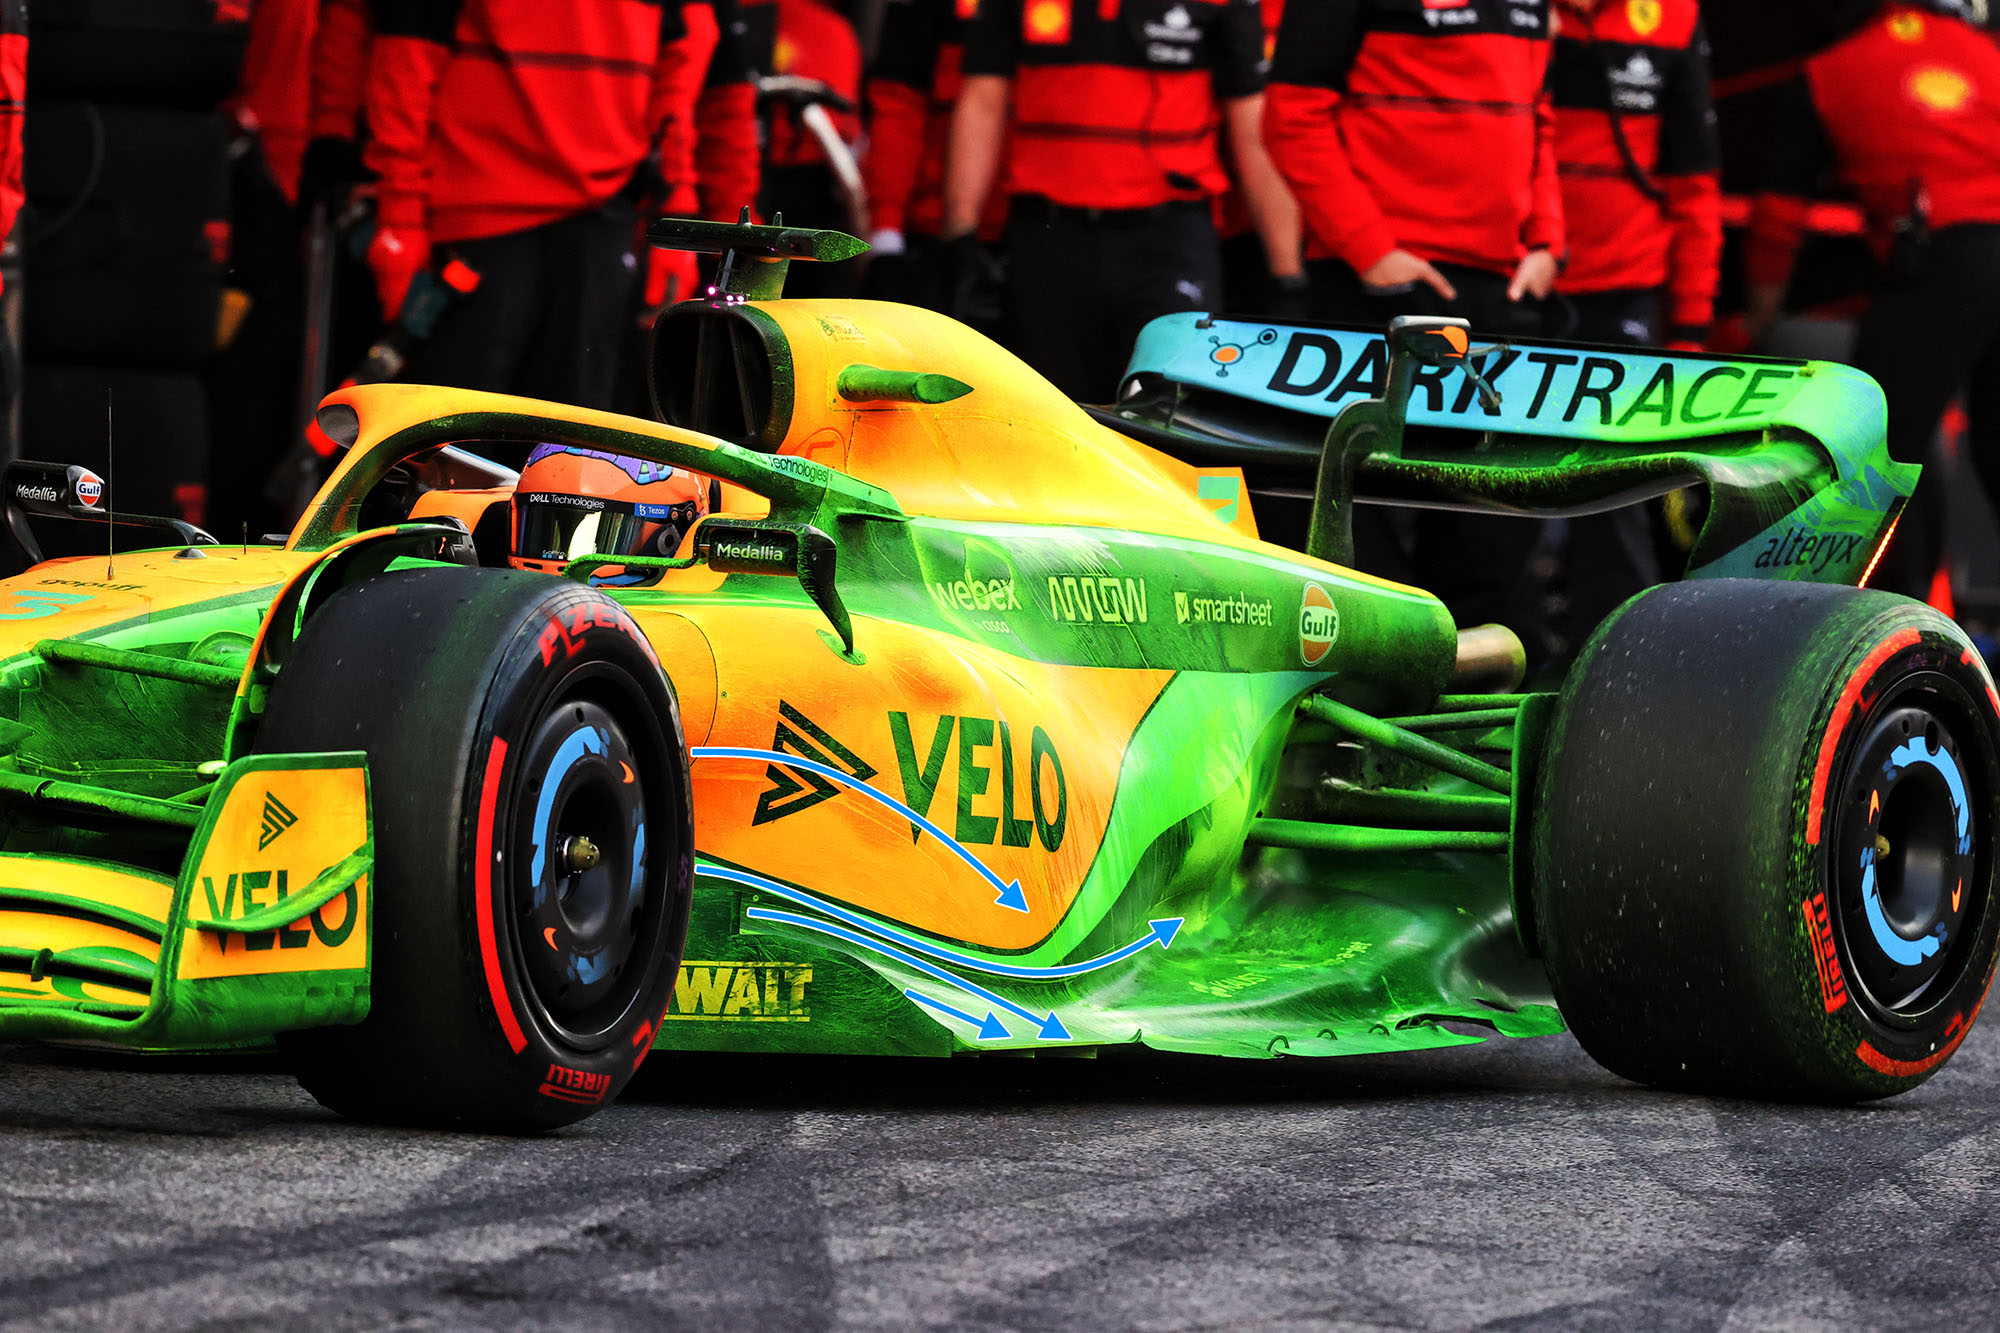
As mentioned in the column about the vortices revealed by running in the wet, the flow around the sides of the car is what generates these.
The flow-vis shows that the surface flow is very sympathetic to the flow of those vortices, so this sidepod and underfloor design will be fairly robust to changing conditions.
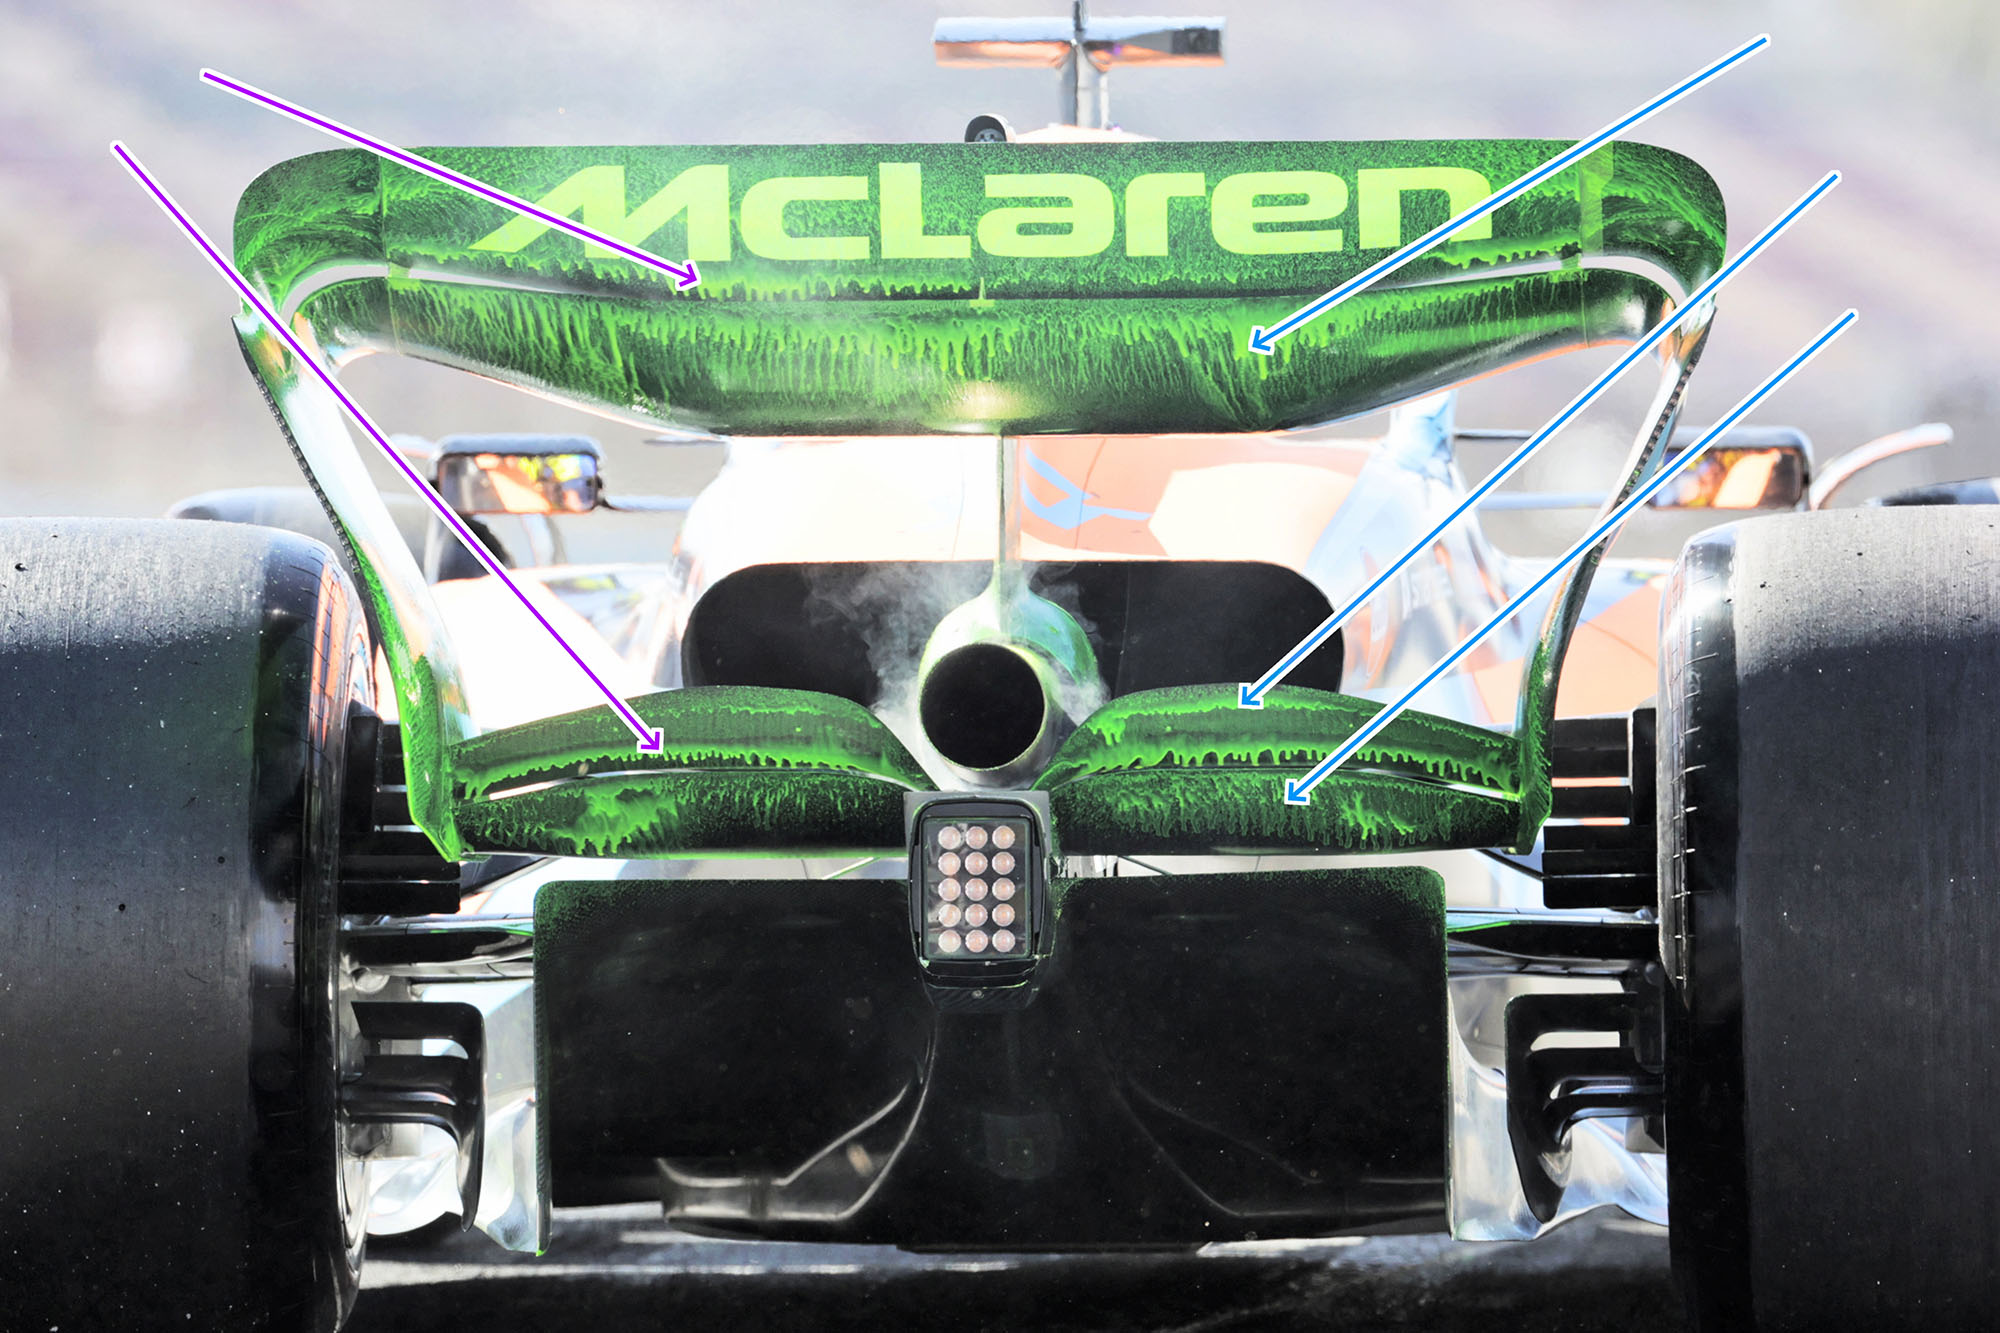
What starts at the front ends up at the back. As you can see, the flow-vis at the slot gap of the upper wing just below the McLaren decal both on the main plane and flap has not quite flowed as well as it has at the outer ends where the flow is not quite worked at hard. It is very similar on the lower beam wing,
The blue arrows show where it is fairly normal, as you want the undersurface to work as hard as possible before you introduce the slot gap.
However, where I have put the arrows would be a little more worrying as the high-speed flow coming through the slot gap should pick up this flow-vis and disperse it up the flaps under surface.
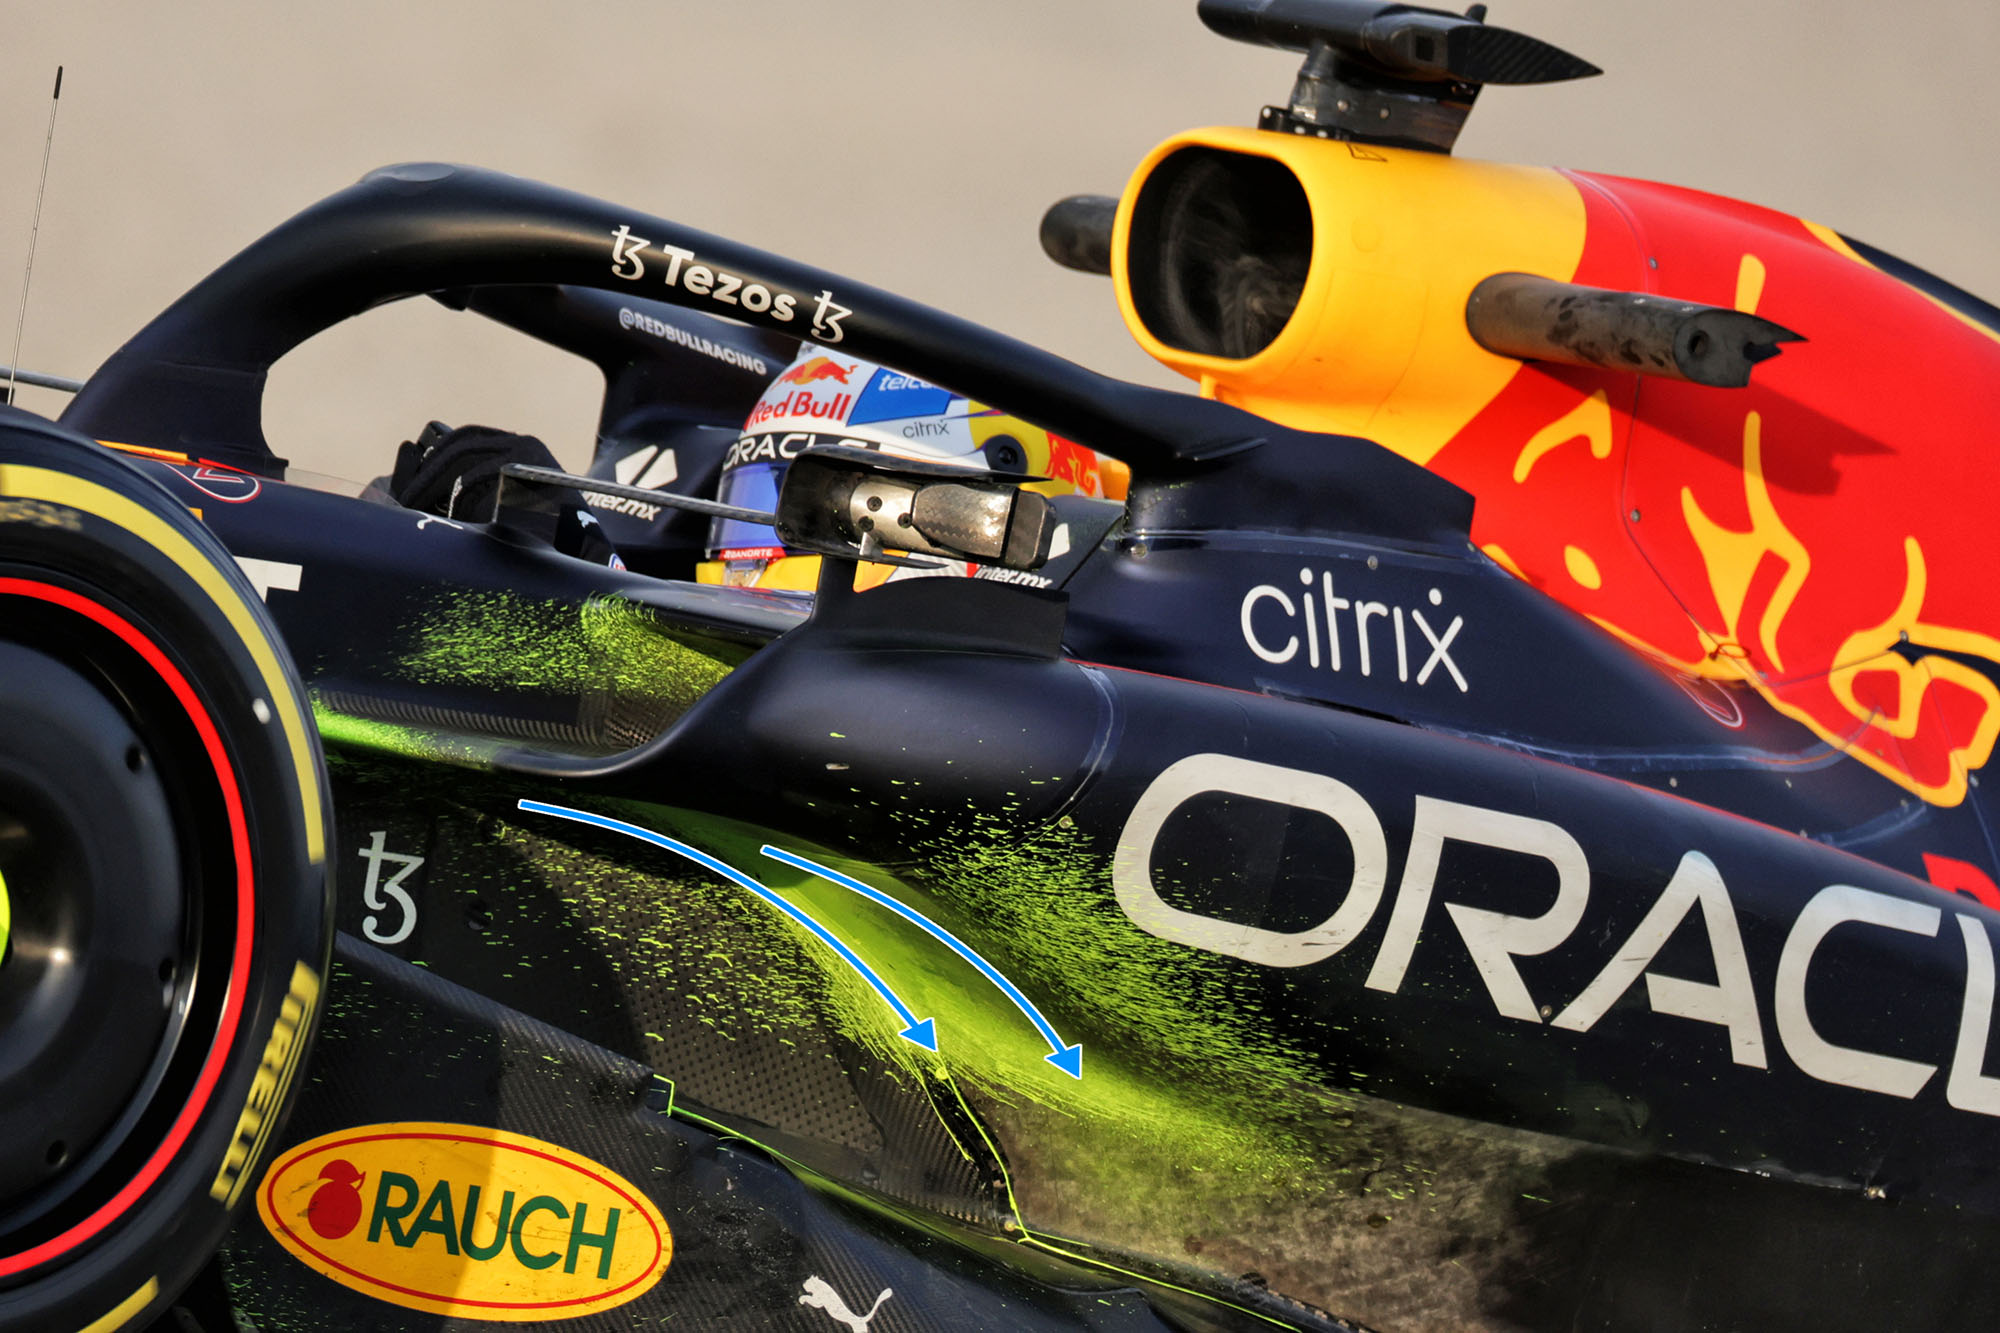
Red Bull’s use of flow-vis was a little more conservative. It focused on its ‘different’ radiator intake concept and the outer vertical floor vanes – or as we now call them replacement bargeboards.
These two areas work hand in hand in generating the vortices that help with sealing the sides of the underfloor.
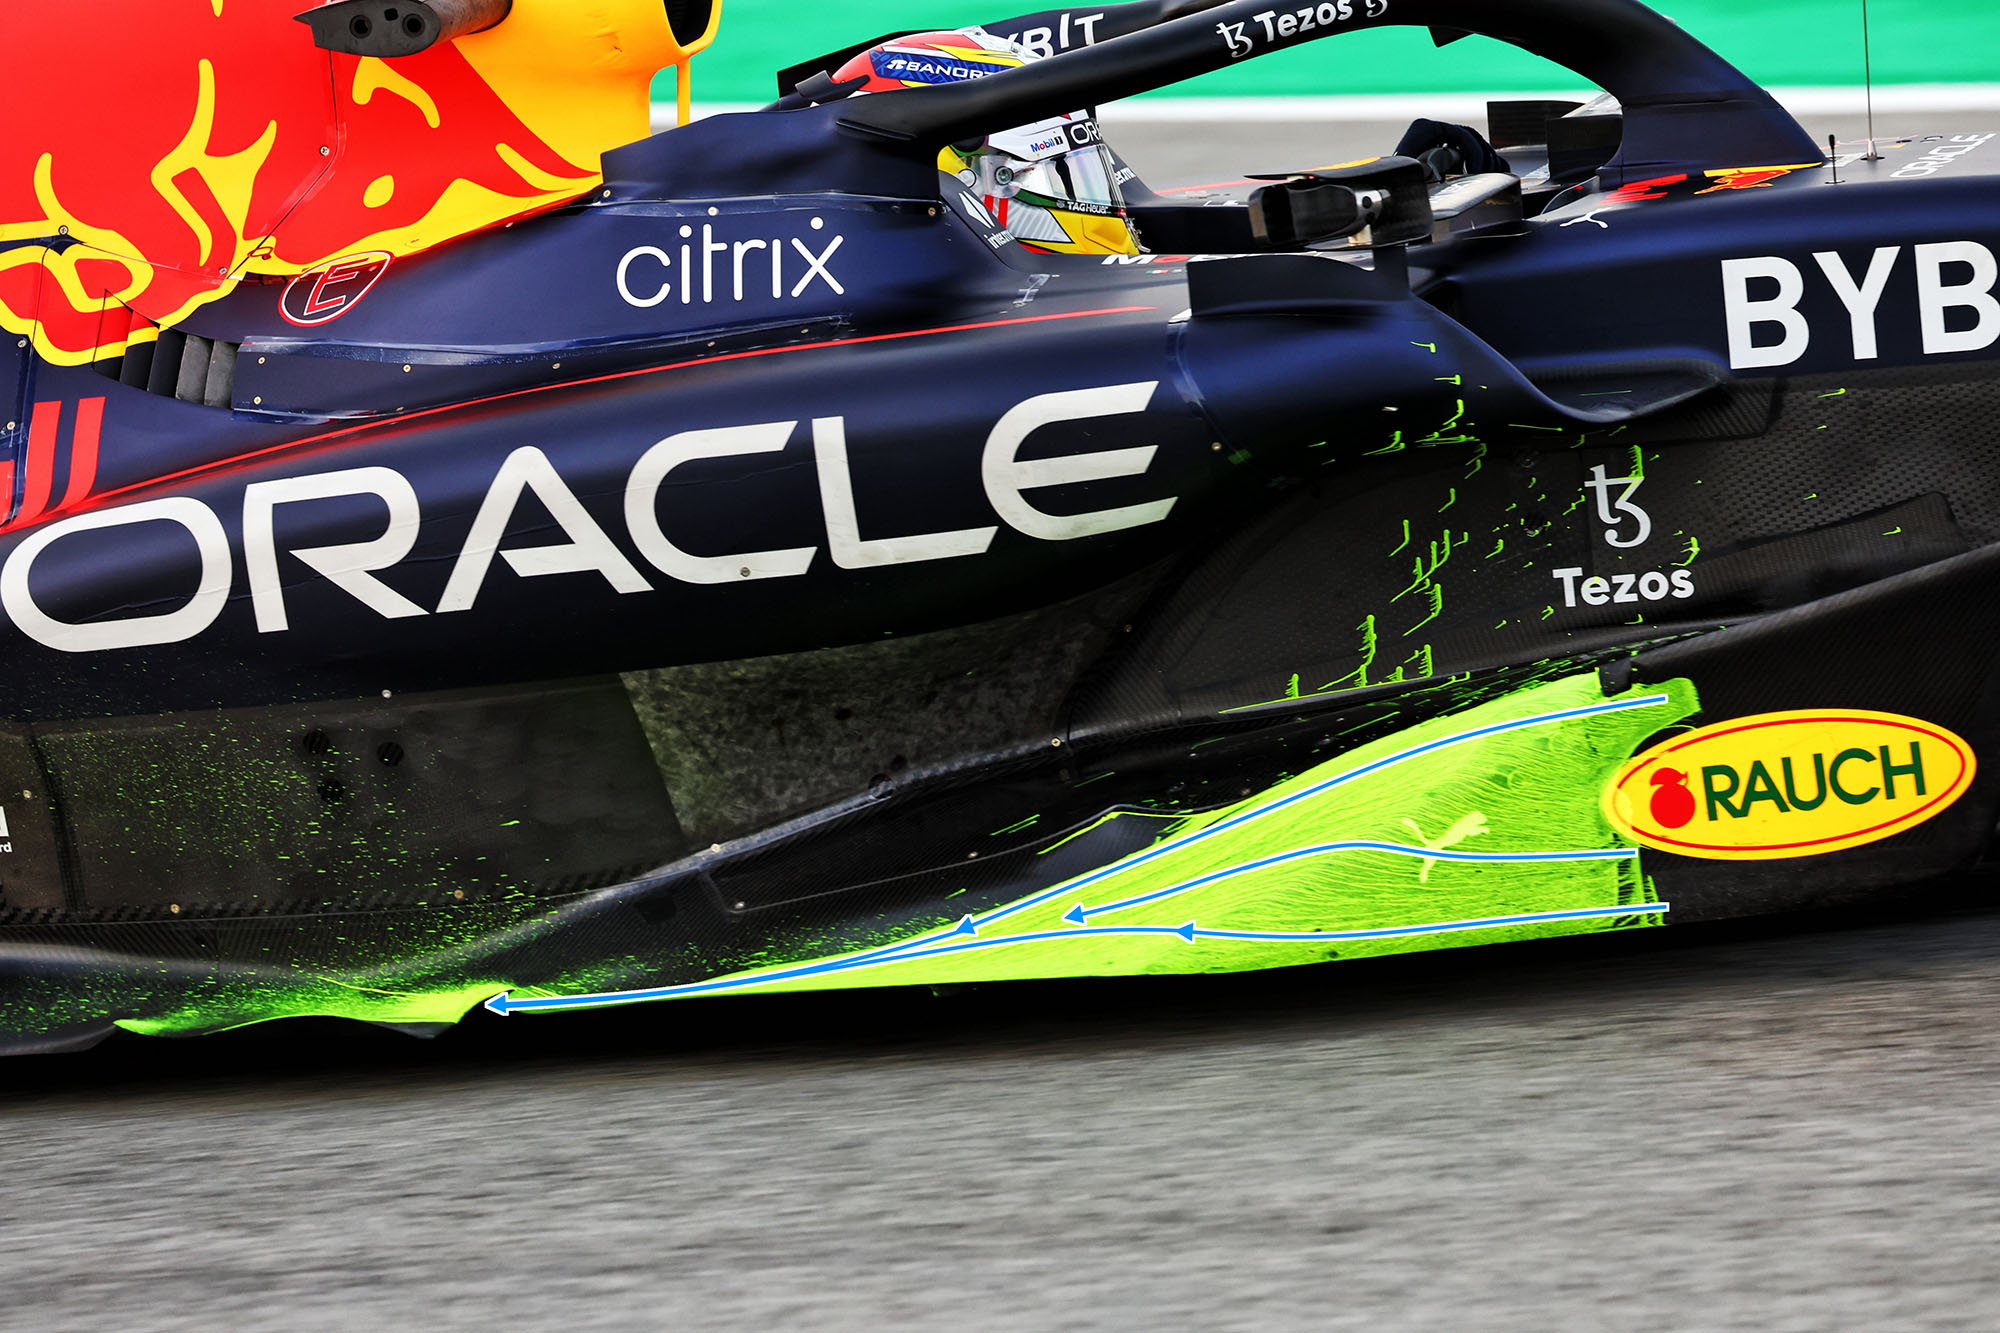
This outer vane creates outwash, which is then pulled back in with the small floor duct to imitate the rotate that leads to the vortex trailing down the side of the car.
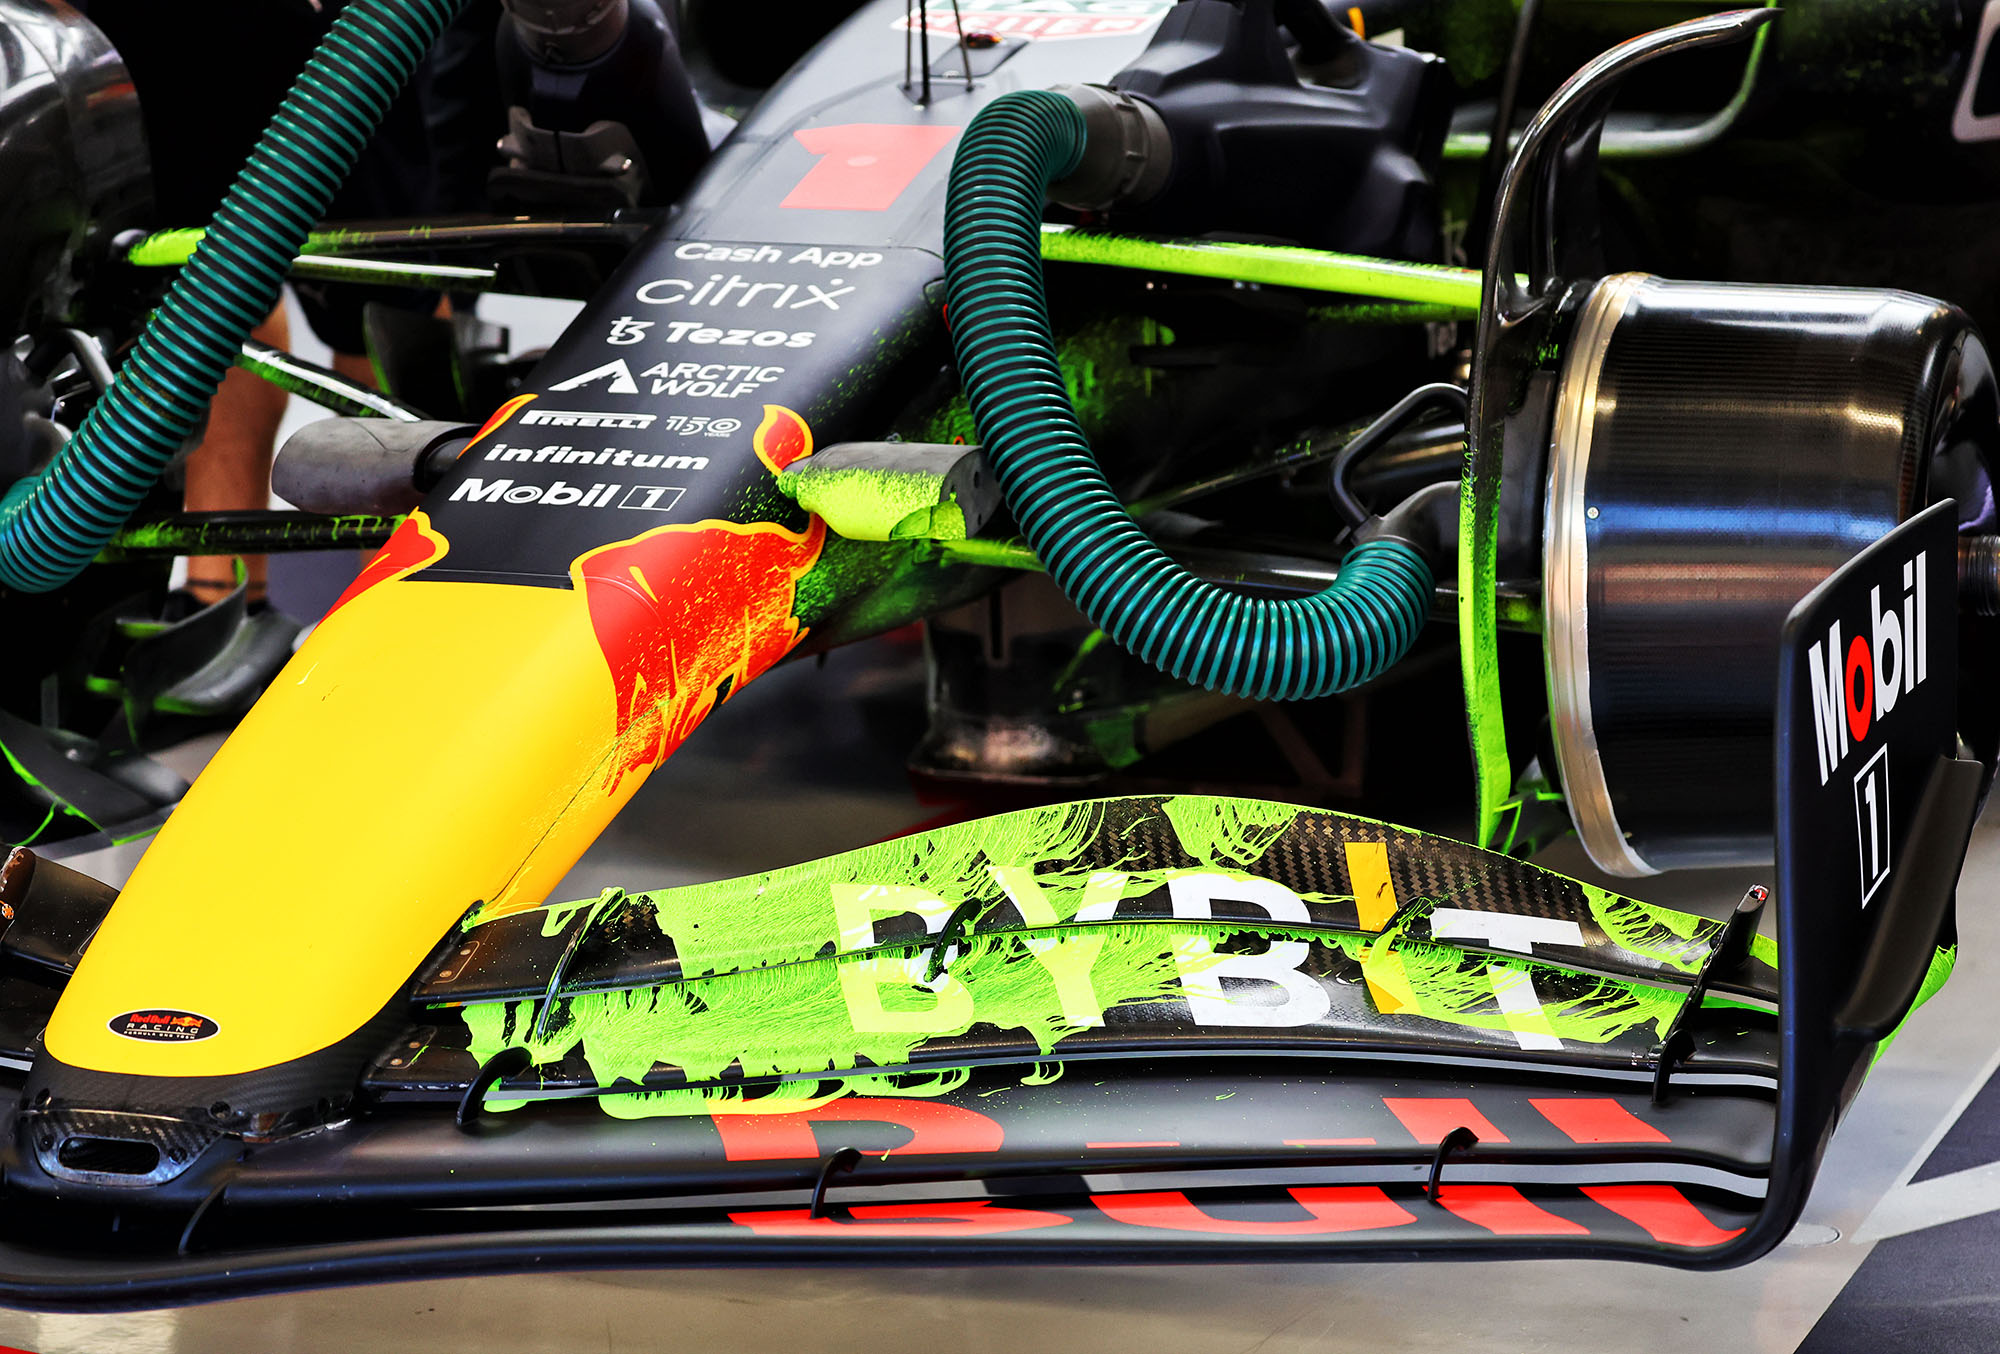
I’m not sure Red Bull learned a lot from this flow-vis test, but you can see how defined it is on the lower part of the inner wheel fairing and the forward leg of the top front wishbone.
The flow on the top surface of the wing is interesting as there is a lot of transverse flow, but as it’s not over the complete surface it’s difficult to comment on.
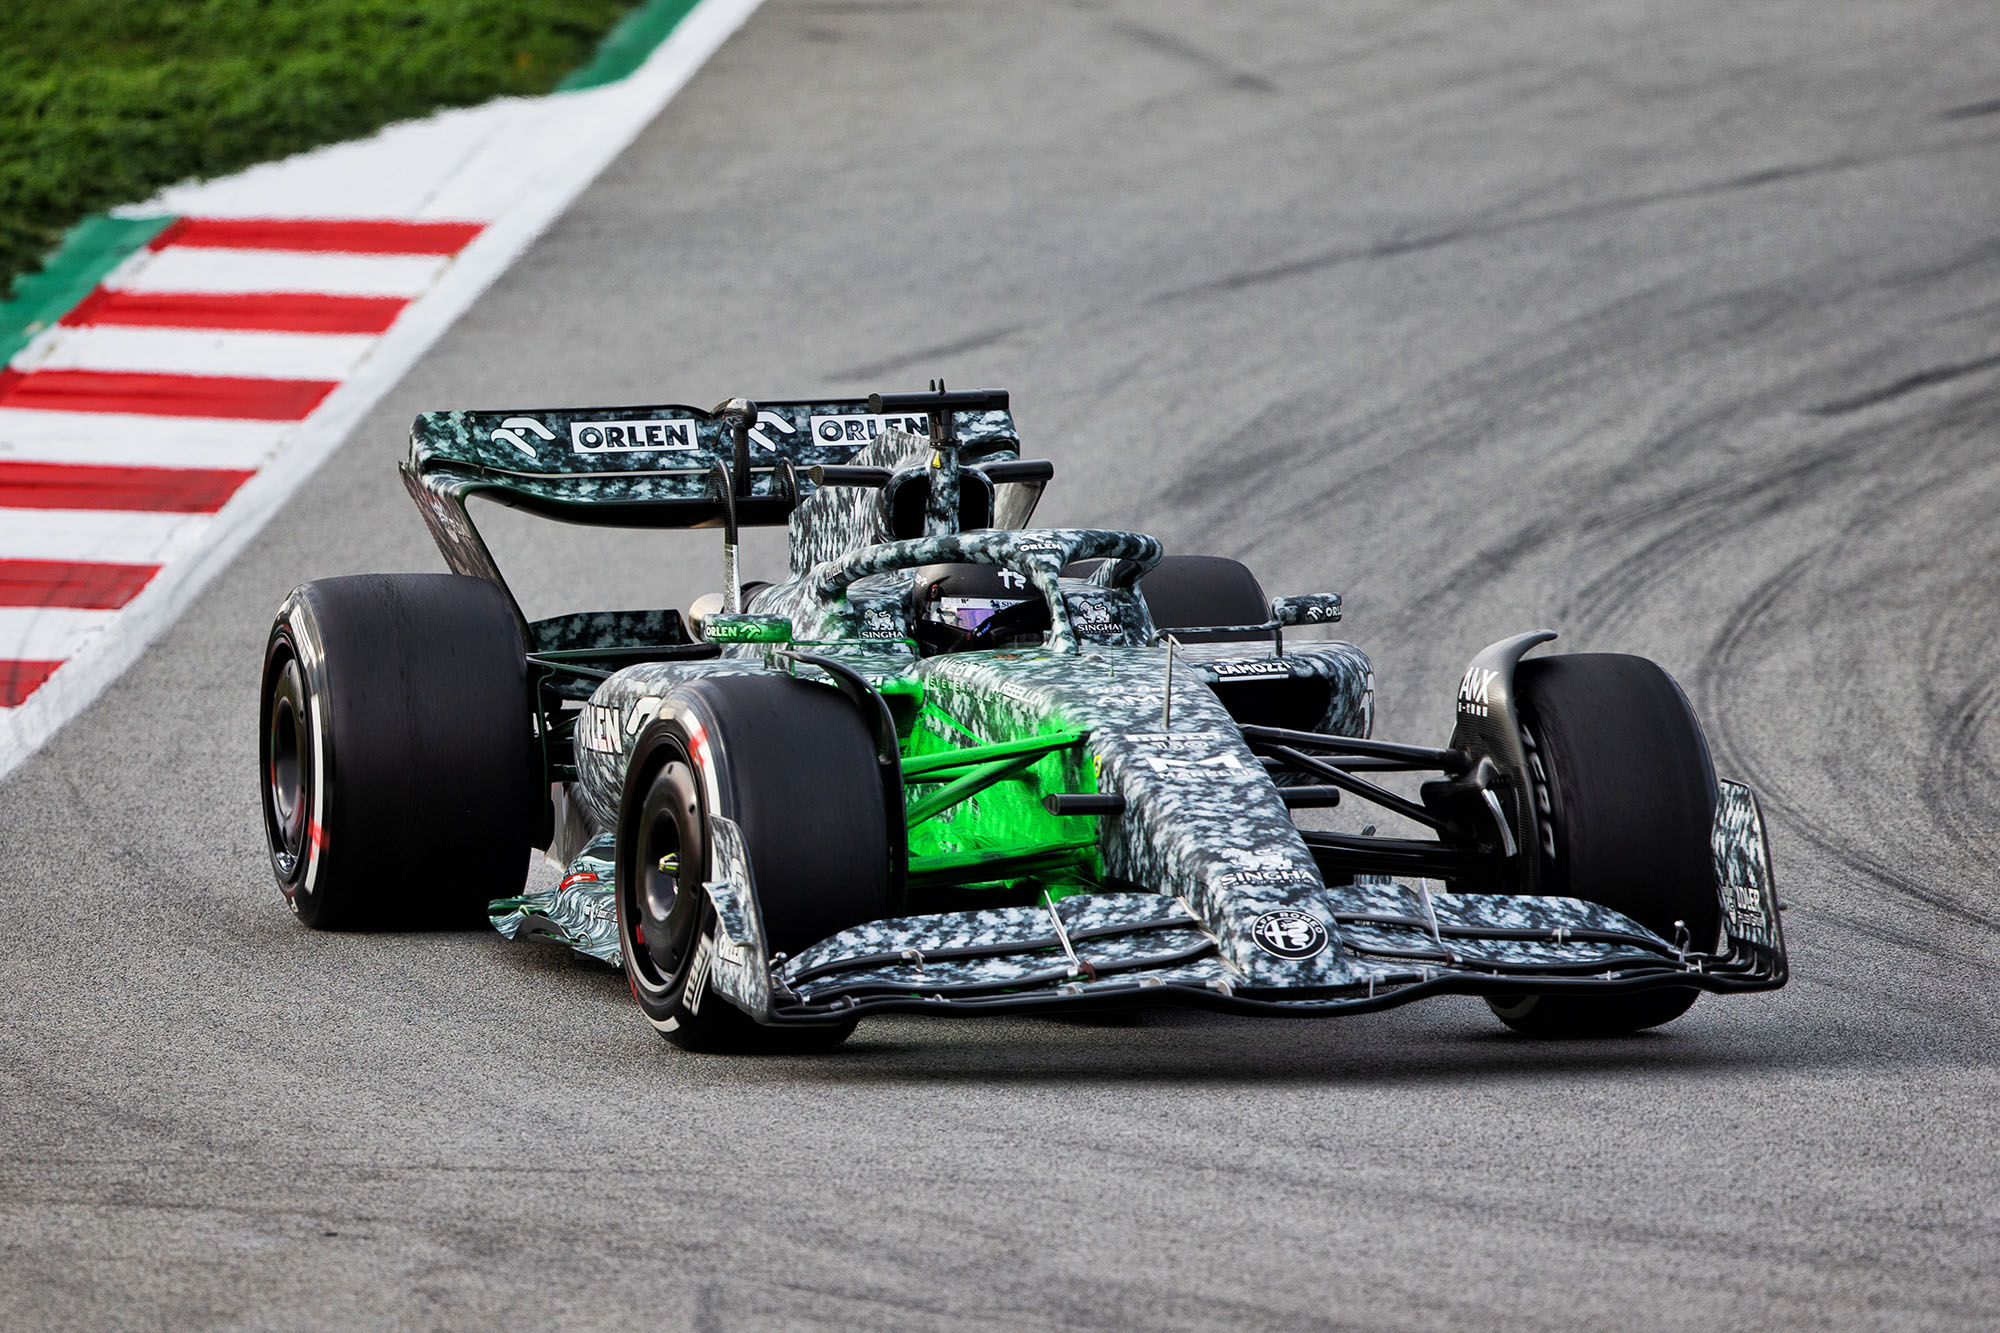
Here, Alfa Romeo was having a detailed look down the side of its car to see how the bluff sidepod undercut was turning the airflow.
It had quite a few problems with porpoising so understanding the floor’s sealing systems is vitally important to rectifying this problem.